
There is no denying that Facebook is not as popular as it used to be. In fact, the meta-owned social media giant lost 1 million daily users for the first time since its launch in the fourth quarter of 2021. If you are planning to take a break from Facebook or are no longer interested in using the platform, here is how to deactivate your Facebook account on the website, Android and iPhone.
Steps to Deactivate Facebook Account:-
Difference Between Deactivating and Deleting Facebook Account:-
Although most people use these terms interchangeably, there is a significant difference between deactivating and deleting your Facebook account. While deactivating your Facebook account is a temporary measure, deleting your account is permanent and unalterable after 30 days.
If you deactivate your account, the Facebook pages linked to your account will also be deactivated. Similarly, if you delete your account, Facebook will delete all linked pages. In short, if you plan to take a break from Facebook, your account should be deactivated. On the other hand, those who want to move away from Facebook for good should have their account deleted.
Deactivate Facebook Account on the Web:-
- Sign in to your Facebook account on the web, click the down arrow in the upper-right corner, and select “Settings and Privacy.”
- From the Extended Settings and Privacy menu, click “Settings” to access your Facebook settings.
- From the left sidebar, switch to “Your Facebook info” and click on the “Disable and Delete” section.
- Now, select “Deactivate Account” and click on the blue “Continue Account Deactivation”.
- Facebook will now ask you to enter your password for authentication. Enter your Facebook password and click “Continue” to proceed further.
- You need to choose the reason for leaving Facebook now. Looks like a classic Growth Hack Move, Facebook does not allow you to disable automatic account reactivation when you select “Temporary”. I’ll be back. “Therefore, we recommend that you choose one of the other options.”
- Scroll down and choose whether you want to continue using Messenger and opt out of Facebook emails. If you are not interested, uncheck the checkbox and click “Disable”.
- from the confirmation prompt that appears now, click “Deactivate Now” to temporarily deactivate your Facebook account.
- Facebook will now redirect you to the login screen and show a prompt confirming that your account has been deactivated. You can then sign in using your Facebook Certificate to reactivate your account.
Deactivate Facebook Account on Android:-
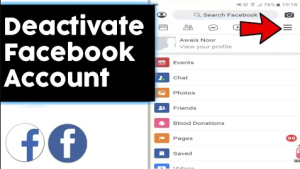
- Open the Facebook app and tap on the Hamburger menu in the top right corner. Then, tap “Settings and privacy” and select “Settings”.
- Under Account Settings, select “Personal and Account Information” and select “Account Ownership and Control” to view your Facebook account settings.
- Now, tap on “Deactivate & Delete” and select the “Deactivate Account” toggle. Once you’re done, press “Continue to deactivate account”.
- Now you should choose a reason to deactivate your Facebook account. Unlike Facebook on the web, you can choose to disable automatic reactivation when using “Temporary”. I will come back to Facebook’s mobile app as a reason Choose a reason and use the drop-down to select an automatic reactivation date
- Set automatic reactivation “Do not reactivate automatically” and press “Continue”. That way, Facebook won’t automatically reactivate your account, and you can choose to go back whenever you’re ready.
- As a final step, choose whether you want to continue using Messenger and receive notifications from Facebook. Then, tap “Deactivate my account” and that’s it. You have successfully deactivated your Facebook account.
Deactivate Facebook Account on iPhone:-
- Open the Facebook app on your iPhone and switch to the Menu tab from the navigation bar below. Now, press “Settings and Privacy” and select “Settings”.
- Tap “Personal and Account Information” under Account Settings and select “Account Ownership and Control” from the next screen.
- Next, press “Deactivate and Delete” and enable the “Deactivate Account” toggle. After you do this, tap “Continue deactivating account”.
- Choose the reason for deactivating your Facebook account and tap “Continue”. Be sure to select the “Do not reactivate automatically” option from the next screen to avoid automatic account reactivation.
- Press “Continue” and review if you want to receive notifications and continue using Messenger. Finally, press “Deactivate My Account” to deactivate your account on Facebook.
- As you can see in the picture below, Facebook will now deactivate your account. You can choose to access your account by logging in with your Facebook certificate.
Conclusion:-
Hopefully, through this post, I have been able to tell you How to deactivate your Facebook Account. If you have any questions you can ask in the comment below.