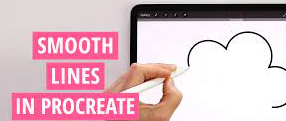
Confusing strokes and messy outlines are a nightmare for any artist. Without smooth dark lines, many works of art would lose their clean and impressive value of aesthetics. Well, the new Procreate 5.2 update brings a multi-request feature to help you with this problem. One of the major features of Procreate 5.2 is called Stroke Stabilization. As a major upgrade to the existing streamline features in Procreate, this is one of the most sought-after features by artists. We can unpack a lot with the stabilization feature, so let’s not waste too much time and learn how to use stroke stability in Procreate on iPad.
Stroke Stabilization in Procreate:Explained:-
The purpose of this feature is to help artists create smoother and more tapered strokes. You don’t have to constantly think about every turn and twist when drawing outlines or shapes that enable stroke stability. The process can help you draw faster and without many accidental ups and downs. The end result here will be even and smooth and will work on any supported iPad model, including the M1 iPad Pro and even the new iPad Mini 6. The stabilization option packs many options, use the table below to avoid your features.
How to Turn on Stroke Stabilization Per Brush in Procreate:-
Procreate has both global and brush-based settings for stroke stability. First, we will focus on the brush-based features that you can apply to individual brushes. It has deeper alternatives and is used more than global stability. So, let’s open the Procreate app and get started.
- First, open your existing artwork. You can tap the “+” button in the upper right corner of the screen. To create a new canvas you can choose the size that best suits your needs. You can also choose to import and draw 3D models in Procreate. The app does not allow us to edit brush settings from outside the canvas.
- Once the artwork is open, tap the paint-brush icon at the top right of the screen. This will open the brush library with a list of brushes available in ProCreat.
- Here, you can scroll through the various brushes installed in your app. Once you find the brush whose settings you want to adjust, tap on the name or pattern of the brush. This will open the Brush Settings page. We will edit the settings of the “Monoline” brush under the Calligraphy section for this tutorial.
- Taping on the brush will take you to Brush Studio, i.e. on the settings page. You can find different settings for each brush available in the app here. To access the Stroke Stabilization feature in Procreate go to the “Stabilization” section from the left sidebar.
Now, there are several separate options in the stabilization section of Brush Studio. We’ll go over each of them as we talk about the difference they’ll make with your stroke.
Stroke Stabilization Features in Procreate:-
ProCreat Brush Studio’s new Stability section has three options, including Streamline, Stability, and Motion Filtering. Each of them may sound similar, but they offer a unique way to smooth out your strokes. So without further ado, let’s go over each option to better understand them.
StreamLine:-
Many Procreate users may already be familiar with the streamline setting because it was available on the app even before the 5.2 updates. Not much has changed with this popular brush setting. Streamline removes the irregular movement caused by minor accidents while creating your stroke.
With regular strokes, the ink moves freely from your brush and is affected by even the tiniest movement of your fingers. Meanwhile, as soon as the streamline is turned on, the ink follows a hard path and does not allow your stroke to be affected unless there is a large movement of the brush. Let’s see what happens to a normal round figure if I increase the amount of streamline from 0% to 100%.
As you can see, the circle drawn along the streamline is smoother and less wobbly than a regular circle. This is close to the actual size of a circle with the same minimal effort. You can use this feature to create calligraphy, shapes, and even outlines. Streamline has two internal settings.
-
Amount:-
It determines the stickiness and evenness of your stroke. You can use the slider to turn on streamline values for smooth strokes. However, stopping it will bring you back to your normal stroke.
-
Pressure:-
Once the pressure on the streamline has stopped, the stroke smoothing will begin as soon as you stroke. But if you increase the pressure using the slider, the smooth effect will start as soon as you apply some pressure while drawing strokes.
Stabilization:-
This feature can be seen as a more aggressive version of Streamline. Stability, technically, takes an average of the movements you make through a stroke and a predictive average of what you are trying to do. Simply put, instead of following the movements of your natural pencil, it automatically makes your shape much smoother and smoother.
So, what you get with active stroke stability in Procreate is a simpler shape than your actual movement or the actual stroke you created. To better understand this, see what happens in regular circulars since I have increased the value of stability from 0% to 100%.
Motion Filtering:-
If you think stroke stabilization is too serious to turn your hand-drawn circle into a straight line, wait until you see motion filtering.
As the name implies, this feature filters out all the restless movements detected by Procret’s algorithm. Yes, there is no average or focus on accidental movement like the other two options. In contrast to stability, motion filtering is not affected by the speed of your stroke. So, regardless of your pressure or speed, motion filtering will give you smooth and straight strokes. Let’s see how the feature works and how it affects a simple round image.
-
Amount:-
Use the volume slider to increase speed filtering and make strokes more straight and smooth. Keep it below 70 to avoid losing the ability to create curved figures.
-
Expression:-
This setting prevents the rigorous behavior of motion filtering algorithms. It gives your stroke some normal expression. This means it ignores a few minor ups and downs and still tries to incorporate your normal stroke flow, keeping the figure mostly straight and smooth.
How to Enable Stroke Stabilization for all Brushes in Procreate:-
If you want to use stability with one or two brushes, adjusting it to the internal settings seems like a good option. However, this is also possible if you want canvas-wide stability to save time and labor. With the Procreate 5.2 update, the app has introduced the global “Pressure and Smoothing” settings for the convenience of users. Here’s how to access it.
- First, tap the “Action” button in the upper left corner of the screen, it will appear next to the “Gallery” option.
- Then, from the Action drop-down menu, toggle the “Prefs” option. Then, tap the “Pressure and Smoothing” option.
- Now, you will see the option to adjust the stabilization, motion filtering, and motion filtering expressions. The use of these options remains the same as described in the section above. You can use the slider for each option by swiping your finger or pencil to adjust the values. The rest of the settings here are related to stress, and you can leave them as they are.
Stabilization vs Streamlines in Procreate 5.2 Updates:-
In previous versions of Procreate 5.2, users had the option to use Streamline as the only reliable alternative to smooth strokes. There was no option in the app to work according to the pressure. By comparison, the latest update gives you 3 different types of stroke stabilizers. Each of them has unique functions and techniques to smooth out your strokes in the process. Also, you have the option of sorting your strokes according to the desired speed, pressure, and normal expression.
To understand how this update actually differs, let’s create an image with the original Streamline option and then recreate it using the new stabilization options. In both cases, there is a complete digestive tract.
The first difference you can notice here is the smooth flow of the line. The stabilization feature automatically removes any shaking or instability during your drawing. Then, they help you to automatically create a shape, which is most noticeable in the triangular flag part. Stroke stability in Procreate 5.2 will not take away your normal size if you use it with the right settings. You can play with each stabilizer until you find the one that works best for you.
Conclusion:-
Hopefully, through this post, I have been able to tell your people about how to draw smooth lines with stroke stabilization in procreate. You’ve found the site you have been looking for to watch people. Keep away from some websites. If you know anything you can ask through the comments below.